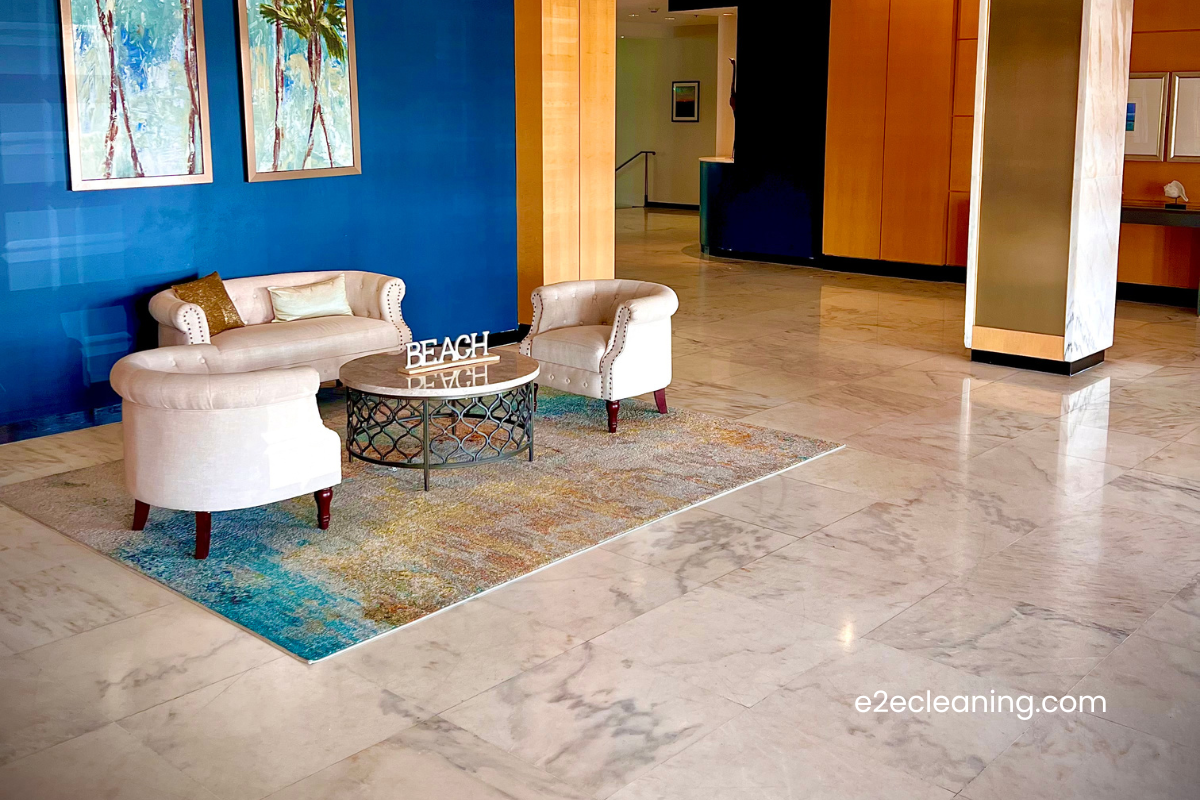
Natural stone floors are an investment. Limestone, marble, travertine, and granite bring elegance and sophistication to any commercial space.
But foot traffic, spills, acidic substances, and daily wear detract from even the best-maintained surfaces. Dull or worn stone that once had a glossy luster starts to look scratched and tired.
Restoring a dull stone floor doesn’t require replacement. Professional stone restoration brings back the natural beauty of natural stone surfaces and protects them for years ahead.
Why Stone Floors Lose Their Shine
Stone is durable but not indestructible. Dullness builds gradually through constant pressure:
- Foot traffic grinds embedded dirt and grime into the surface. Even stone like marble, which looks resilient, can suffer micro-scratches and dull spots that regular maintenance alone won’t reverse.
- Acidic substances like coffee, juice, or certain cleaning products etch into the finish and strip it without warning.
- Spills left untreated penetrate grout lines and create stains that routine cleaning and polishing can’t reach.
- Non-pH-neutral cleaners accelerate surface deterioration faster than normal wear.
Restoring a stone floor isn’t a job for guesswork. Each stone type responds differently. Using the wrong abrasive or technique without knowing the material can cause irreversible damage. Here’s how professionals approach it:
The Professional Stone Restoration Process
Restoring a stone floor isn’t a DIY job. Each stone type responds differently, and using the wrong abrasive or technique without knowing the stone can cause irreversible damage. Here’s how professionals approach it:
1. Assessment and Deep Cleaning
Before any restoration work begins, the stone is assessed. Stone type, depth of damage, embedded dirt in grout lines. A pH-neutral stone cleaner removes surface grime without damaging the stone, giving a clear picture of what the work requires.
2. Honing
Progressively finer abrasives bring the stone back to a flat, smooth surface, removing scratches, etch marks, and buildup from worn stone surfaces. The right restoration method at this stage determines how well the polish holds afterward. This is the foundation of every serious restoration process.
3. Polishing
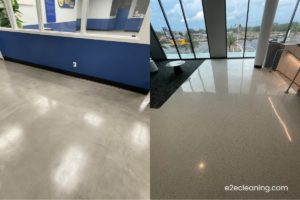
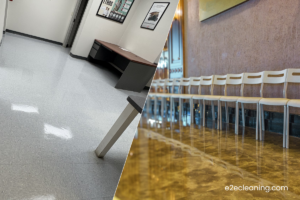
Once the surface is even, polishing powder and high-grit abrasives restore the stone’s natural luster. Cleaning and polishing damaged stone floors at this stage is where restoration can bring the floor back to the condition it had on install day. Light reflects evenly. The surface reads as maintained again.
4. Sealing the Stone
A high-quality stone sealer is applied to protect the restored surface from future spills, stains, and acidic substances. Without proper sealant, restoration work won’t hold. Sealing the stone extends the life of the floor significantly and is the final step in restoring a stone floor correctly.
When It’s Time to Call a Professional
Not every scuff needs a full restoration. But if you’re seeing any of these, it’s time to bring in professional stone restoration:
- Floors that look dull even after cleaning
- Visible etch marks or scratch patterns
- Stains that won’t lift with a standard cleaner
- Grout lines that are discolored or deteriorating
- Worn stone surfaces in high-traffic zones
The longer these go unaddressed, the more complex and costly the work becomes.
Maintenance Tips to Protect Your Investment
After professional stone floor restoration, regular maintenance is what keeps the results holding. Protecting your investment comes down to consistency:
- Use only pH-neutral stone cleaners for daily maintenance
- Clean spills immediately, especially acidic substances like citrus or coffee
- Schedule professional deep cleaning every 6 to 12 months depending on foot traffic
- Reseal annually or as recommended to ensure the stone remains protected long term
- Use entrance mats to reduce debris tracked onto natural stone surfaces
To restore dull floors and keep them looking sharp, the maintenance schedule matters as much as the restoration itself.
FAQs
Can limestone be restored?
Most limestone surfaces can be fully restored regardless of how scratched or etched they look. The depth of the damage determines the method. A professional assessment confirms what’s possible for your specific floor.
What happens if you don’t seal limestone?
Unsealed floors are exposed to spills, acidic substances, and foot traffic with no protection. Over time, stains penetrate deeper, etch marks become permanent, and the restoration work required grows significantly. Sealing after every restoration is essential.
How do you repair damaged limestone?
The process starts with deep cleaning to remove embedded dirt and grime without damaging the stone, followed by honing to smooth out scratches, polishing to restore natural luster, and sealing the stone to protect the surface. Attempting this without the right equipment typically makes the damage worse.
How do you make limestone look new again?
Professional honing using progressively finer abrasives brings the surface back to an even, smooth base. High-grit polishing then restores natural luster. Once the restored stone is sealed with a high-quality stone sealer, limestone floors recover their original finish. For best results, sealing should follow every professional restoration.
What should you never use on limestone?
Avoid acidic substances like vinegar, citrus-based cleaners, or bleach. These etch into the material immediately. Always use a pH-neutral stone cleaner for daily care. When in doubt, contact a professional stone floor restoration service rather than risk permanent damage.
Conclusion
A stone floor that looks dull isn’t failing. It’s waiting. The right restoration method brings it back without replacement, without guesswork, and without making the damage worse trying to fix it yourself.
Your stone floor doesn’t need replacing. It needs the right process.
E2E Cleaning Services handles professional stone restoration for limestone, marble, and natural stone surfaces across Tampa Bay. Contact us to restore your stone floor with an on-site assessment.